At Selmo, the HMI (Human-Machine Interface) is equipped with a powerful Sequence Control function that allows creating an individual Sequence Control for each sequence in the process. This function enables precise control, monitoring and diagnosis of sequences within the production process. The Sequence Control provides a clear overview of the steps and zones required for a particular sequence to run smoothly.
A particularly useful feature of Sequence Control is the Single Step function. This feature allows the operator to manually execute a step to test or verify the sequence. This allows the operator to step through the process and ensure that each step is working correctly before moving on to the next step in the process.
In addition, the Sequence Control system provides a step selection function. This feature allows the operator to choose between different steps in a Sequence based on current requirements or conditions. This is especially useful when certain steps need to be skipped or repeated to meet process requirements.
Another convenient feature of Sequence Control is the automatic search for a valid step. This means that the system automatically searches for the next valid step to execute based on current conditions or predefined rules. This saves time and ensures that the process runs smoothly without the operator having to manually search for the next step.
Overall, Sequence Control enables precise control and diagnosis of sequences. It provides a clear overview of the steps and zones required, facilitates step selection, and enables easy searching for valid steps. These features help improve the efficiency of the production process, minimize human error, and ensure reliable execution of sequences.
HMI
Start Sequence
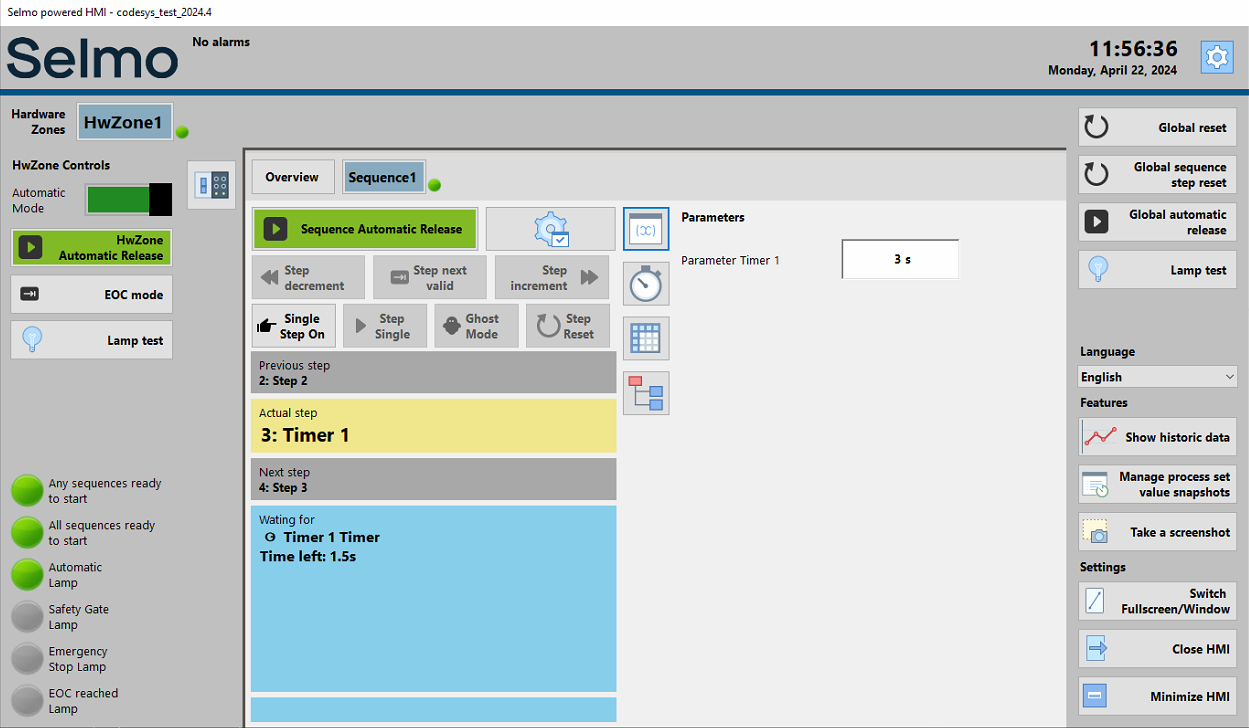
To start the automatic mode of the sequence, the Automatic Mode switch must be activated.

If no error or CMZ is active and thus the 'Waiting for' is colored blue, the automatic mode can be started via the button,
can be started. This releases all sequences in this HwZone.

If you only want to release this sequence, a special button is available for this purpose.

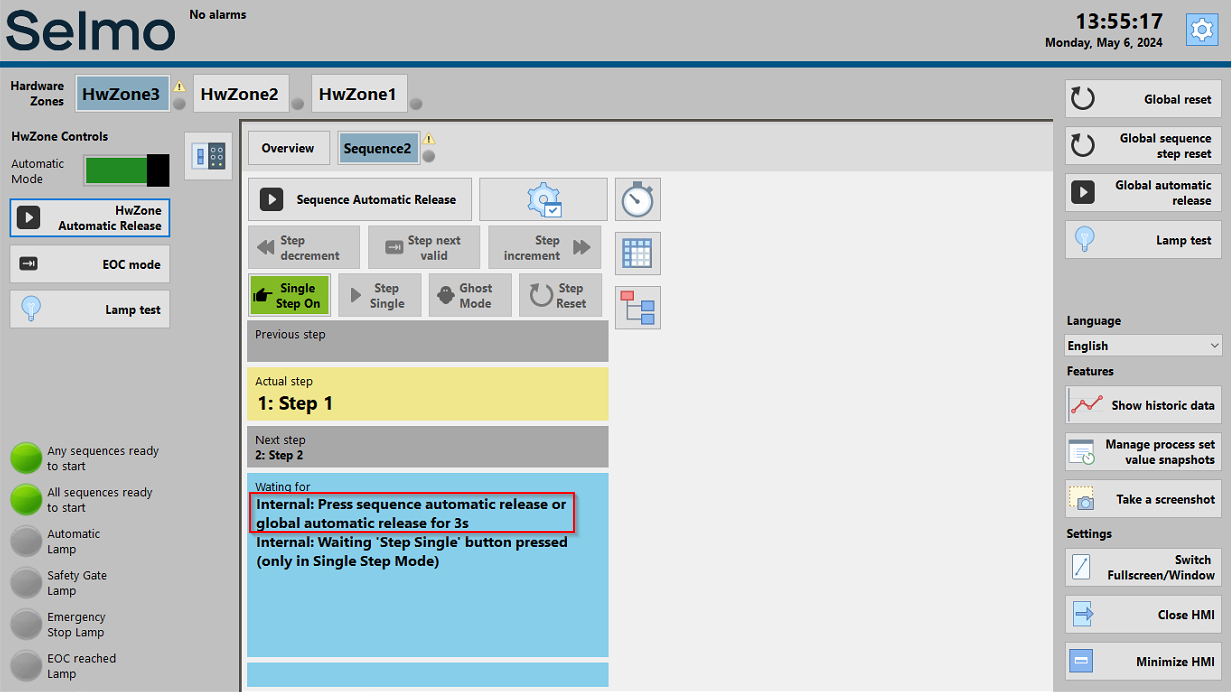
With this button it is possible to start all sequences in all hardware zones in which the automatic mode switch is set to 'Automatic'.

As shown in the 'Waiting for', it is necessary to keep the button pressed for the set time of the Startup-Delay in the Selmo-Studio,
for the set time of the startup delay in the Selmo Studio. The default value is 3s.
HMI
Sequence Control
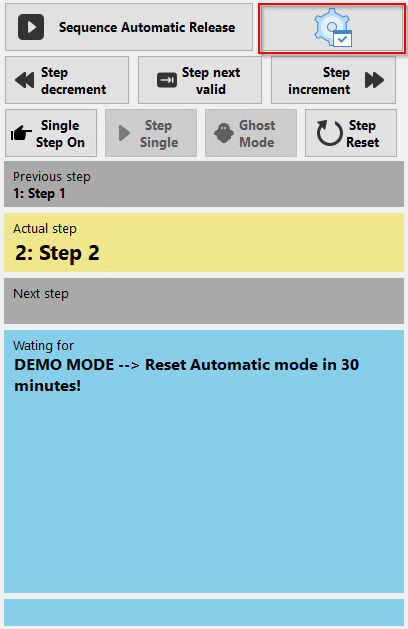
Clicking on the gear icon opens the Sequence Control user interface.
HMI
HMI
Note
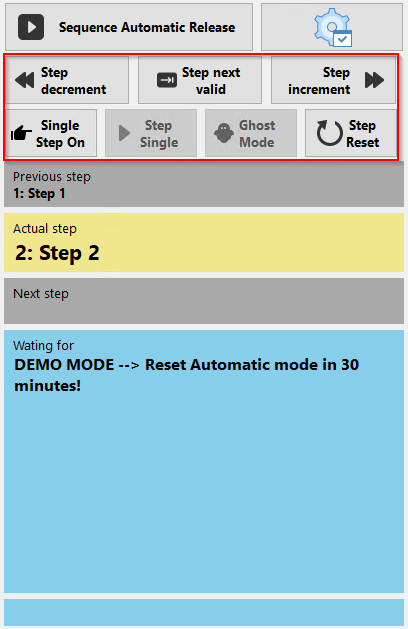
It is important to note that the step functions "Step decrement", "Step next valid", "Step increment" and "Step Reset" are only available in Manual Mode and give you the possibility to control the sequence step by step. Once the Automatic Mode is activated, the system takes over the automatic execution of the steps according to the predefined conditions and rules.
Step decrement
The "Step decrement" is a function that allows you to undo a step in the Sequence. By using this function, you can go back to previously executed steps in the sequence and thus restore the previous state. It is convenient for correcting mistakes or repeating certain actions that may have been skipped or performed incorrectly.
Step next valid
The "Step next valid" is a function that allows you to search for the next possible state that matches the current machine state. This function is especially useful when you are going through specific steps in a sequence and want to make sure that the next step is valid and matches the current state of the machine. By pressing the "Step next valid" button, the Sequence analyzes the current state of the machine and looks for the next valid step based on the conditions and rules set for the machine state. In this way, you can ensure that the steps in the Sequence are executed according to the current machine situation. This feature enables precise and automatic navigation through the Sequence by ensuring that only the steps compatible with the current machine condition are executed. This improves efficiency and avoids potential errors or inconsistencies.
Step increment
The "Step increment" is a function that allows you to take a step forward in the sequence. By pressing the "Step increment" button, you can jump to the next action in the sequence and advance the progress. This feature is especially useful if you want to skip specific steps in the Sequence, either because you are sure they have already been completed or for other reasons. Moving forward in the Sequence can save time and speed up the workflow by moving directly to the next relevant step. It is important to note that when using "Step increment", care should be taken to ensure that the skipped step does not contain significant actions or conditions that could affect the rest of the Sequence. A careful review of the sequence structure and the current state of the machine is advisable to ensure that skipping a step does not have unexpected consequences. Overall, the "Step increment" provides a convenient way to control the progress in a sequence and to target the relevant steps to be executed next.
Step reset
The "Step Reset" is a function that allows you to reset the step counter. Pressing the "Step Reset" button resets the counter to the initial value. This function is especially useful if you want to reset the progress in the Sequence and start over. By resetting the step counter, you have the option of replaying the Sequence without taking the previous progress into account. This can be useful if you want to troubleshoot or retest a Sequence without considering the previous runs. It is important to note that other variables or states related to step progress may also be reset when resetting the step counter. This depends on the specific implementation of the Sequence. The "Step Reset" provides a simple and effective way to reset the step progress in the Sequence and start over if needed.
Note
The Single-Step-On Mode can be turned on or off regardless of the operating mode. However, the confirmation button, like the "Step Single", only works when the automatic mode is enabled.
Single Step On
Switching on the "Single Step On" activates the Single Step mode. In Single Step mode, the Sequence is configured to stop after each step and wait for your confirmation before moving on to the next step. This mode allows you to step through the Sequence and review or test each action individually. After executing a step, you must press the "Step Single" button to resume execution and move to the next step. This gives you complete control over the process and allows you to monitor each step carefully. The Single Step mode is especially useful when troubleshooting, testing, or reviewing a Sequence step-by-step. You can check the machine's state or other relevant parameters after each step and make sure everything is working as expected before moving on to the next step.
Step Single
The "Step Single" is a confirmation button used in Single Step mode to advance the steps step by step. In Single Step mode, the Sequence stops after each step and waits for your confirmation before moving to the next step. When ready to move to the next step, press the "Step Single" button to resume execution and trigger the next step. Pressing the "Step Single" button gives you control over how fast the Sequence progresses. You can control the progress step by step and review each action individually before moving to the next step. This allows for detailed monitoring and review of the sequence and is especially useful when troubleshooting, testing, or reviewing the sequence step-by-step. The "Step Single" button allows you to effectively use the single step mode and advance the sequence at your own pace.
Ghost Mode
Ghost mode can be used for commissioning purposes, for example. For example, if a sensor is missing in a zone, ghost mode can be activated for this zone in order to test the entire model anyway. With the zone in ghost mode, a delay starts until the sequence check is completed and then continues.
![]()
The ghost mode button is grayed out in the HMI, which means that ghost mode must be activated separately. Ghost mode can only be activated via the safety function key, which acts as a key switch and is only accessible to authorized persons. The safety function key exists per hardware zone and must be set to True in Codesys under the IOs of the hardware zone in order to be able to start the button in the HMI.

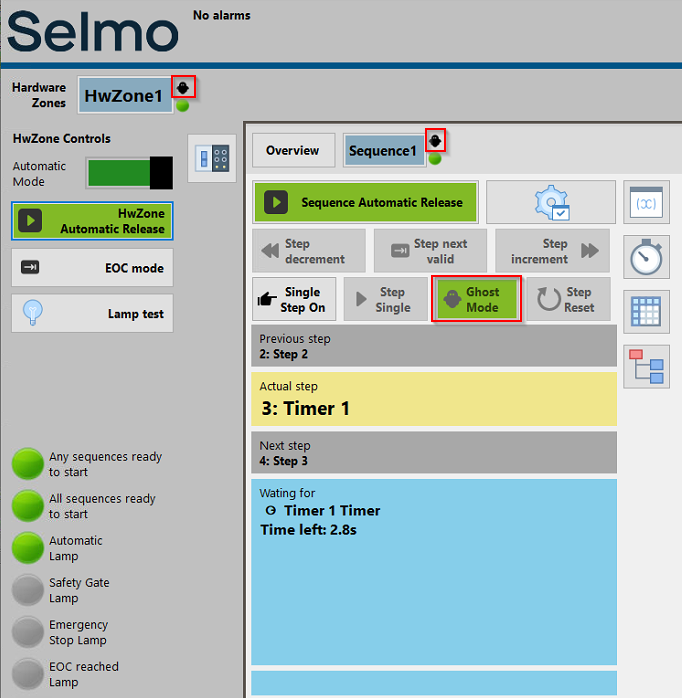
Step Information
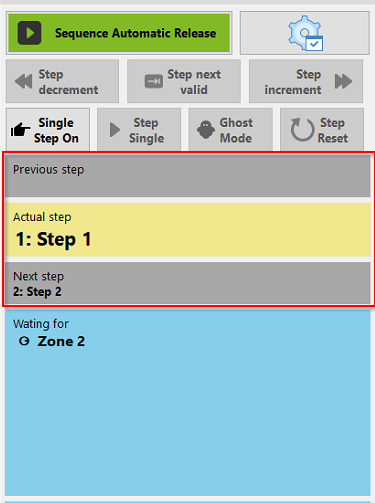
HMI
Preview step
This step shows the previous step or state.
Actual step
This step shows the current state or progress.
Next step
This step shows the next step or the next required action.
Zones Information
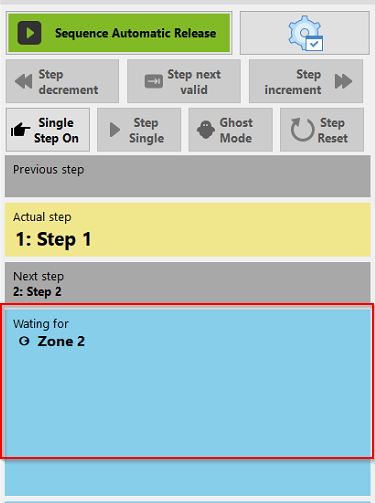
HMI
Waiting for
The defined conditions or zones for this step are displayed in order to reach the next step. This allows the operator to immediately see what signal is missing and act accordingly.
e.g.: Sequence-Check Zone 1
![]()
Monitoring-Check Zone 2
![]()
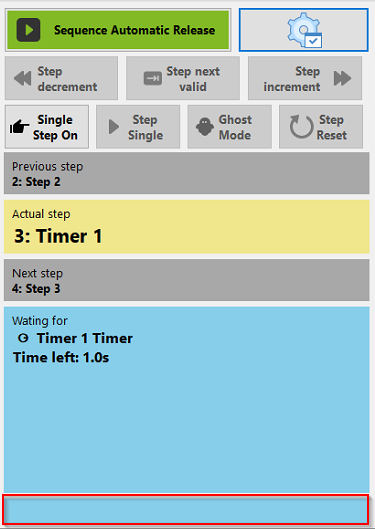
HMI
When the automation is stopped or interrupted by an interlock, the zone information (interlock or sequence check) is stored. This serves an improved analysis. These entries can be deleted by pressing the Global Reset button.
Manual mode
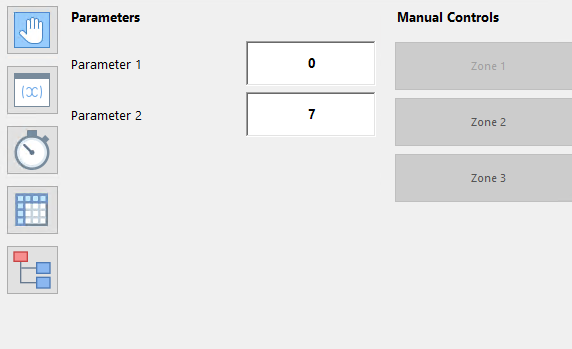
HMI
The zones defined in the Selmo Studio with the "HMI Button" allow to control them from the HMI as long as the Automatic mode is not active. It is important to note that manual operation is only possible when no fault (TCMZ, CMZ) is active.
Parameter
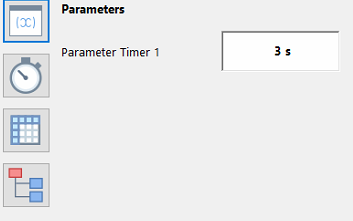
HMI
In this section you can find the parameters for this sequence created in Selmo Studio.
Step Time Monitoring
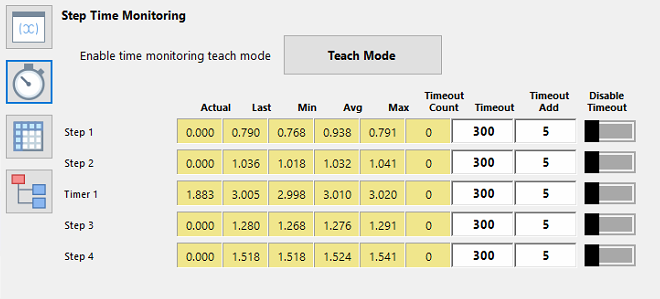
HMI
When evaluating the time, a step has been taken, various metrics can be used to get a comprehensive picture of performance. Here are some common metrics used in conjunction with Step Time Monitoring:
Actual: This is the actual measured time that a particular step took to complete. It is the exact value recorded based on the measured data.
Last (Last): This refers to the time that the step took the last time it was executed. It shows the last measured value and can be used to track changes in performance over time.
Min (Minimum): This is the smallest measured value for the time the step took. It indicates how fast the step can be executed under the best conditions.
Avg (Average): This metric gives the average value of the times the step took during a given period or number of executions. The average value can provide information about the typical or average step performance.
Max (Maximum): This is the largest measured value for the time the step took. It shows the longest time the step took to execute and may indicate bottlenecks or unusual delays.
Timeout Count: Refers to the number of occurrences when a step or operation did not complete within a defined time limit or timeout value. It counts the number of instances when the execution time of a step exceeded the maximum allowable time frame.
By combining these evaluations - Actual, Last, Min, Avg, Max and Timeout Count - a comprehensive analysis of the performance and execution times of individual steps can be enabled. This can identify potential bottlenecks, inefficient areas or issues that need to be optimized to improve overall performance.
Timeout
By setting a timeout value, the system can monitor the execution time of a step and verify that it completes within the defined time limit. If the execution time exceeds the timeout value, the step is considered failed or not completed in time.
Timeout Add
Timeout additional refers to an additional value that is added to the existing timeout value. This extends the timeout value for a given step. For example, suppose you have already set a timeout value of 10 seconds and want to add an additional value of 5 seconds. In this case the new timeout value would be 15 seconds.
Disable Timeout
Disabling timeout, or disabling step time monitoring, refers to when a function or process has no time limits or limits on how long it can execute.
Teach Mode
The "Teach Mode" allows to teach the timeout times by measuring 5 min and deriving the timeout times from it.
System Layer
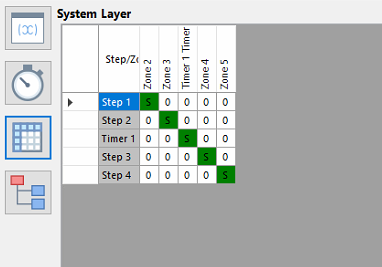
HMI
View of the System Layer as defined in Selmo Studio.
Logic Layer
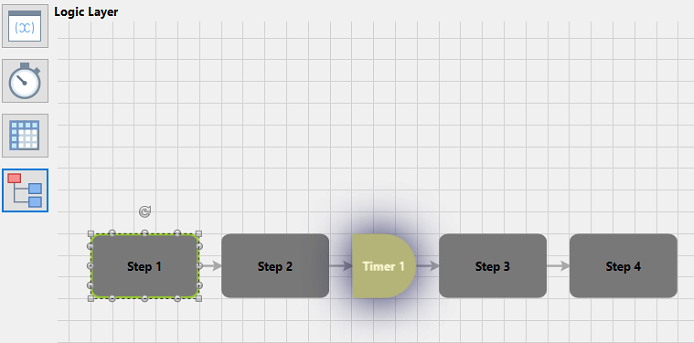
View of the Logic Layer as defined in Selmo Studio, with highlighting of the active step.